Primary Cards
Primary cards are required to open a point of sale (Android or terminal). They determine the level of authorization available to the user: For example, you can authorize access to a "BAR" point of sale without giving access to the "CASHLESS" point of sale which allows recharges.
Always prefer to add named primary cards (linked to a user). This way, you will be able to trace each transaction more precisely. The person responsible for the point of sale is visible in each payment.
To make a card "primary," there are two options:
Use one of the cards provided by TiBillet that is already entered into the system. In this case, proceed directly to Step 3a .
or
Use your own NFC or RFID card (badge, bracelet, card, etc.). If you choose this option, you will need to manually add it to the system beforehand by following steps 1, 2, and 3.
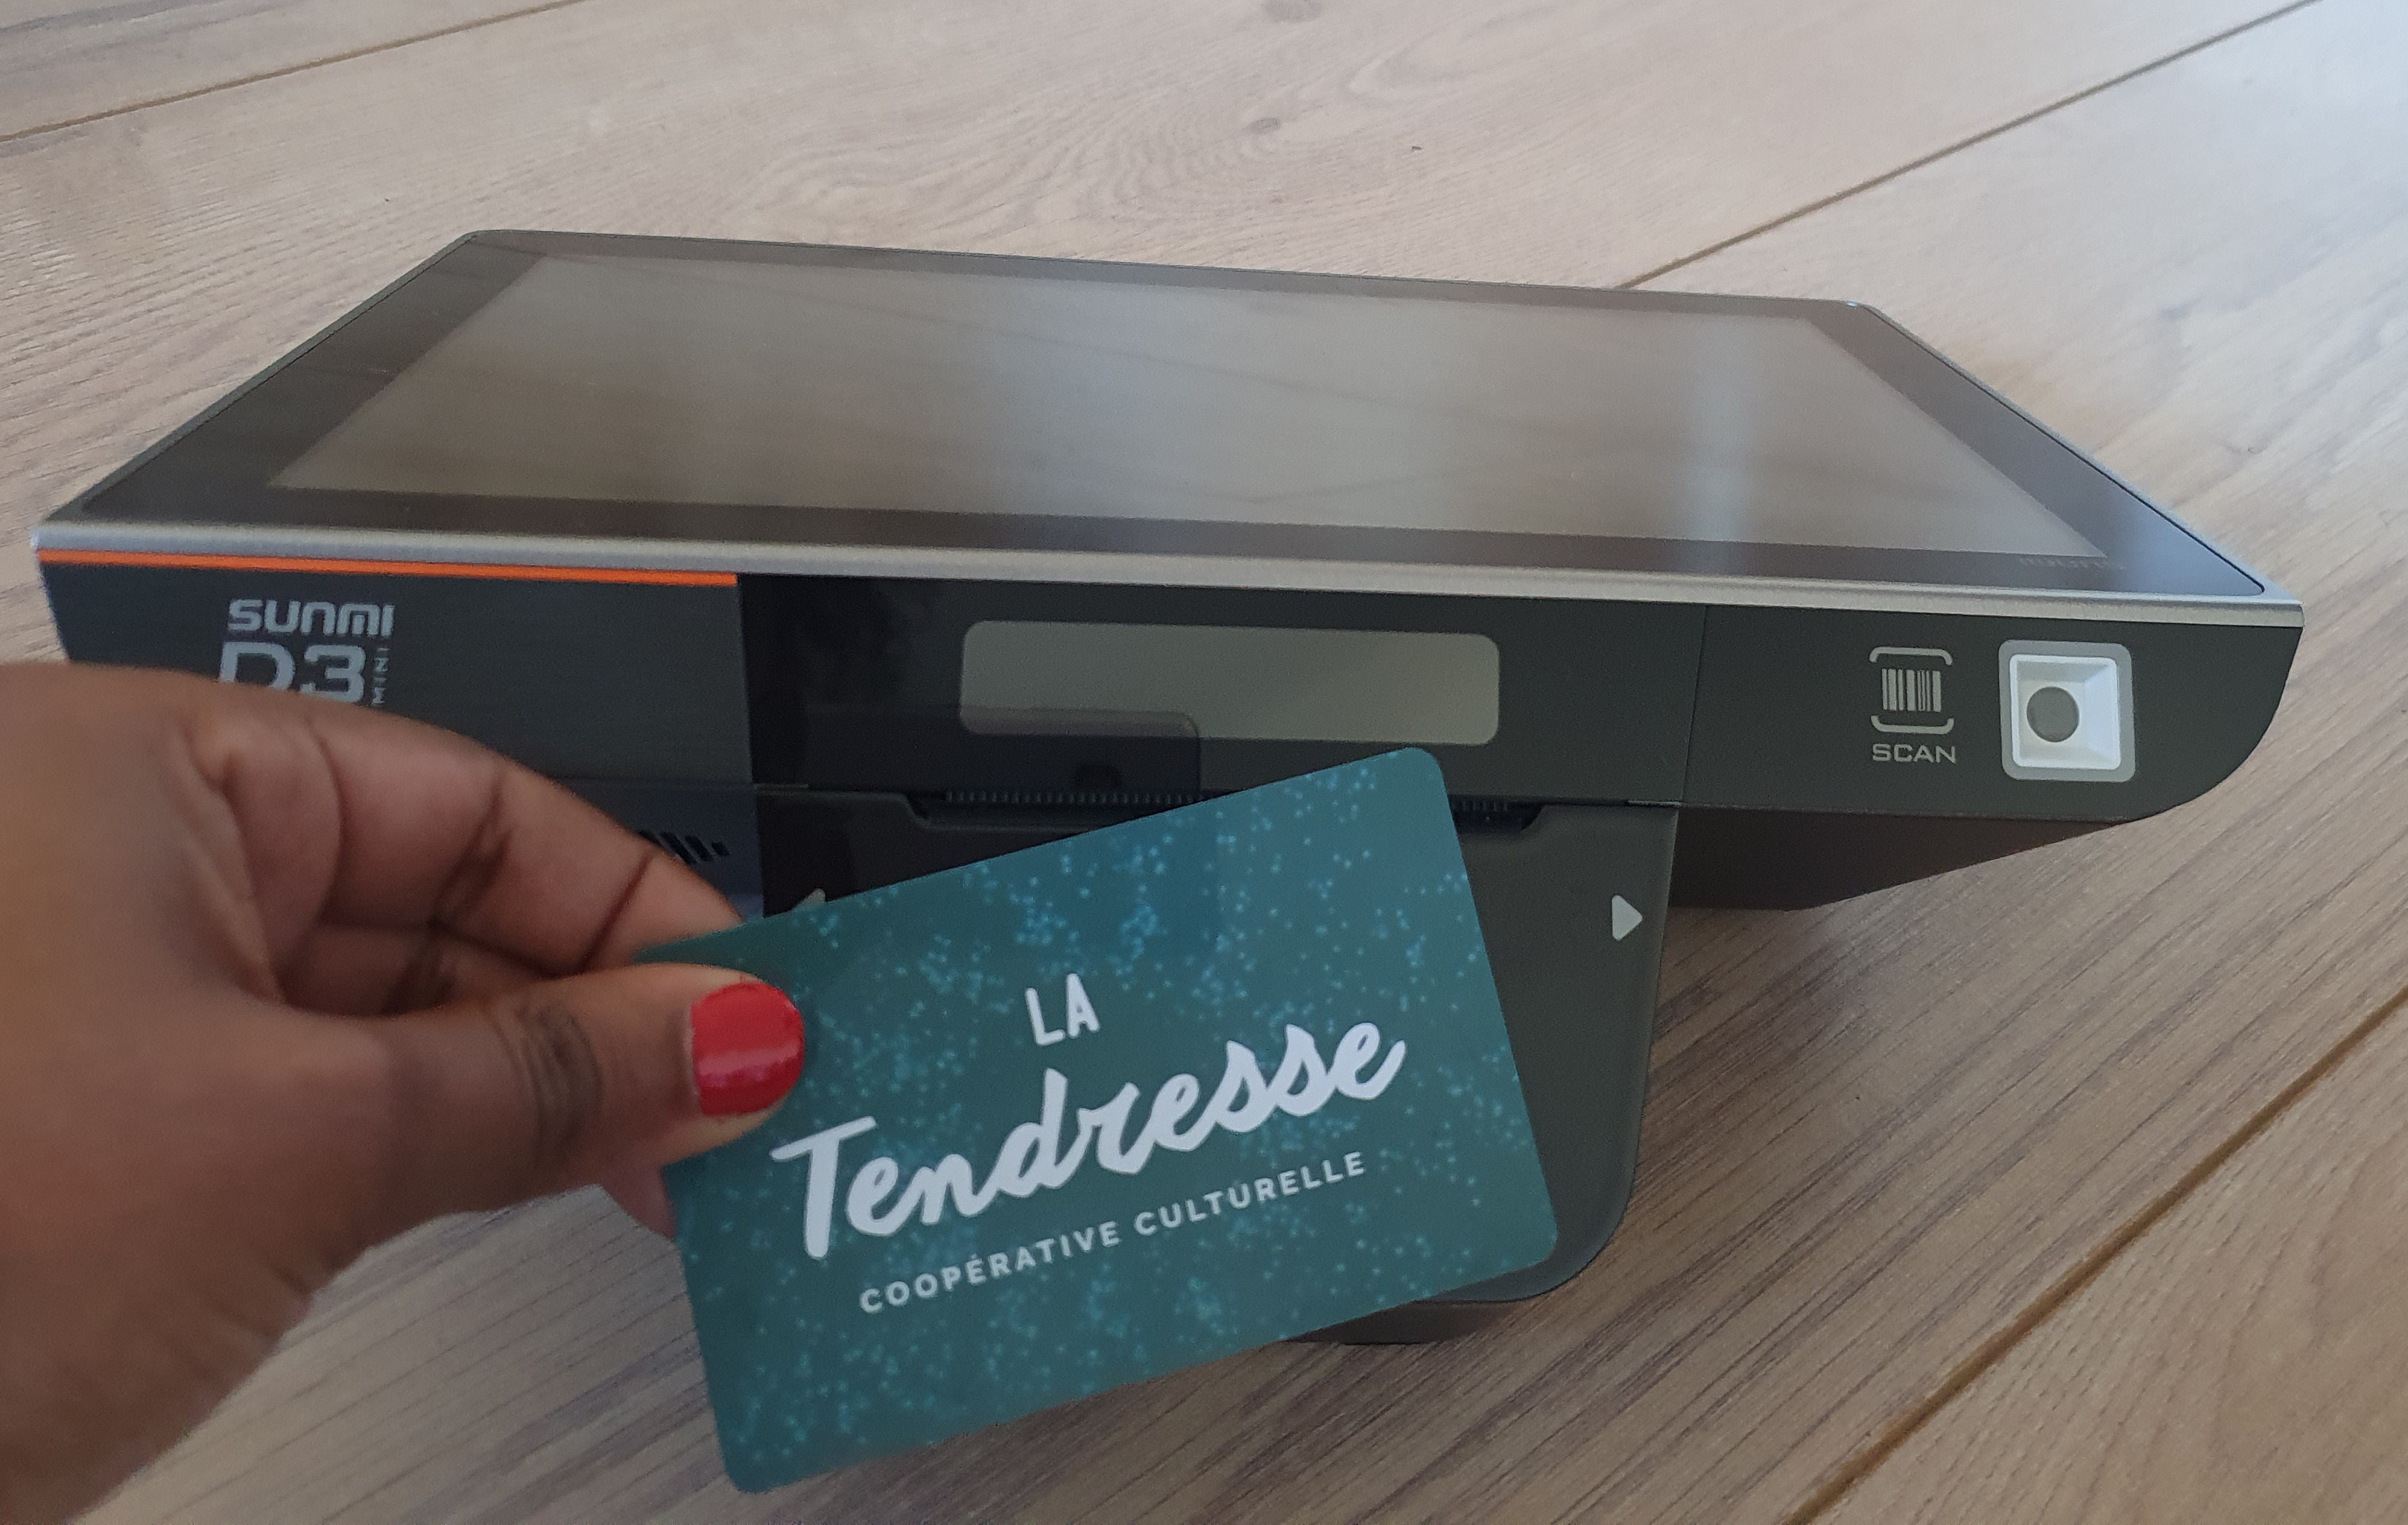
1- Find the UID of Your NFC Card
Get an NFC or RFID tag (e.g., card, building badge, bracelet...). Download the "Mifare Classic Tool" app from a store.
- Turn on NFC on your smartphone.
- Open the app.
- Scan your tag by placing it near your phone's NFC reader. Your phone should vibrate and display "New tag found UID: XXXXXXXX" as a notification at the bottom of the app.
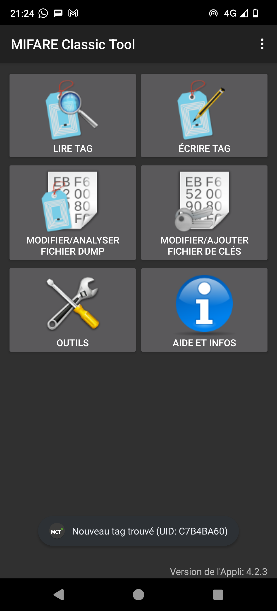
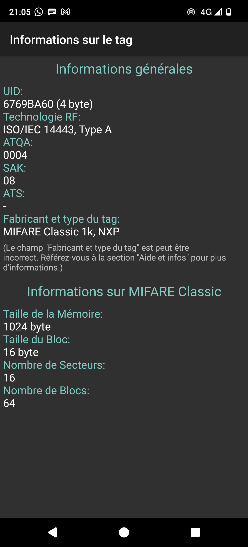
- Go to "Tools" and then "Show tag information."
- Note the UID: a sequence of 8 digits and letters (if your tag is compatible).
2- Add a Cashless Card
In the admin interface: Click on "Cashless Card" and then click the "Add a Cashless Card" button at the top right.
Enter the UID from the previous step in the "RFID TagID" field.
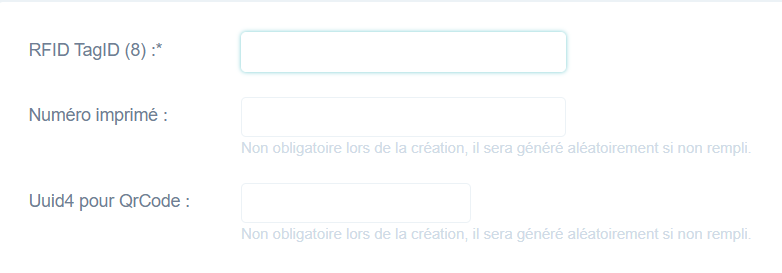
If your physical NFC card has a printed number, enter it in the corresponding field to allow for easier identification. Click "Save": your new card will appear in the table, and the "Member" column will be empty. Note the "printed number."
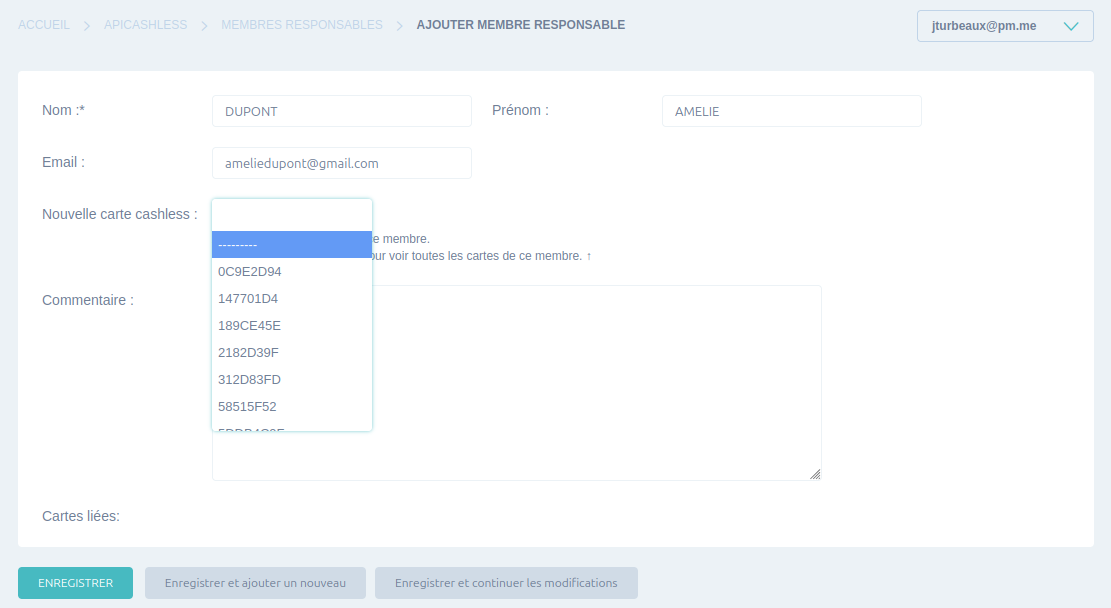
3- Register a New Responsible Member (if using an external NFC/RFID card)
If you're using a card provided by TiBillet, please skip to Step 3a.
If you're using an external card (e.g., your own NFC/RFID card), continue with the steps below.
- Click on the "Responsible Members" category in the left column.
- Click on the "Add Responsible Member" button at the top right.
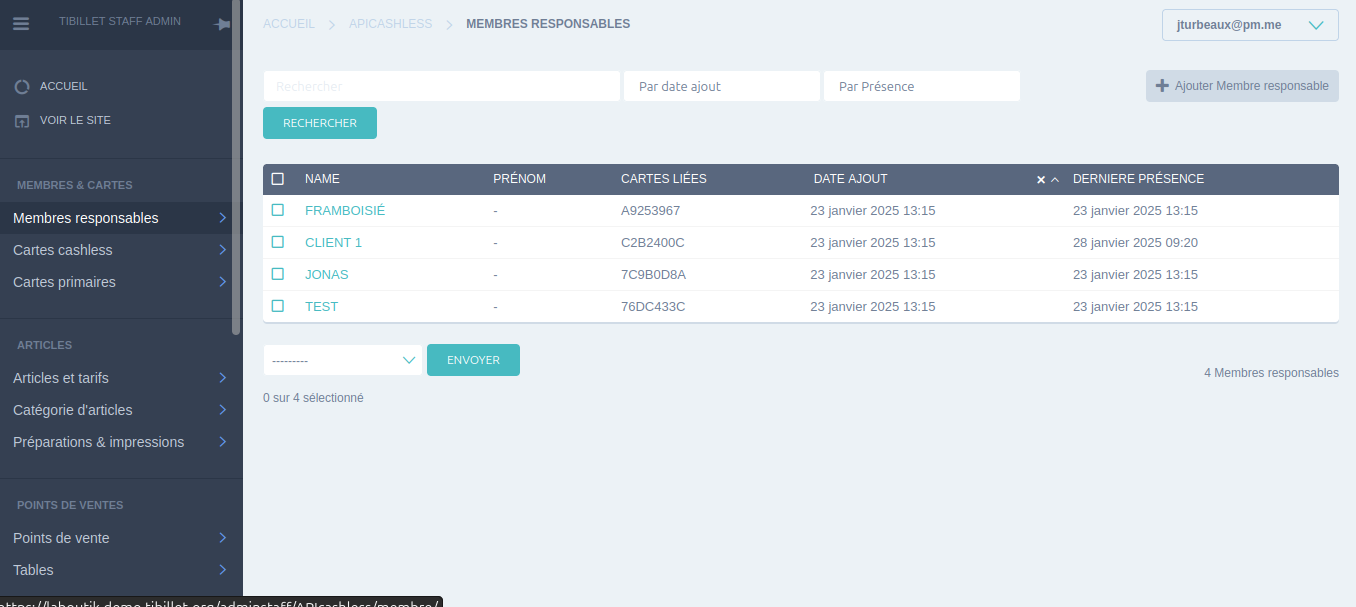
- Enter the member's information.
- Select the "printed number" you noted earlier in the "New Cashless Card" field.
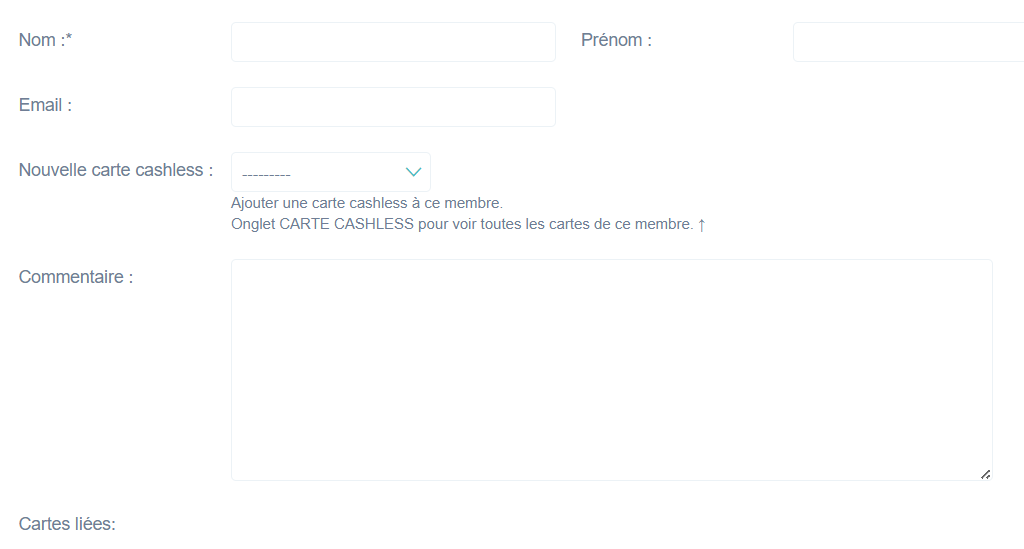
- Save
3a- Register a new responsible member (if using a TiBillet-provided card)
Turn on your cash register, Click the green button corresponding to your location, and when the message "Waiting for Primary Card" appears, scan the card you want to make primary. You will receive an error message, but the card will now be recognized by the system.
- Click on the "Responsible Members" category in the left column.
- Click on the "Add Responsible Member" button at the top right.
- Enter the member's information.
- Select the number indicated on the back of your card in the "New Cashless Card" field.
- Save
4- Make the Card "Primary"
- Click on the "Primary Card" category in the left menu.
- Click on the "Add Primary Card" button at the top right.
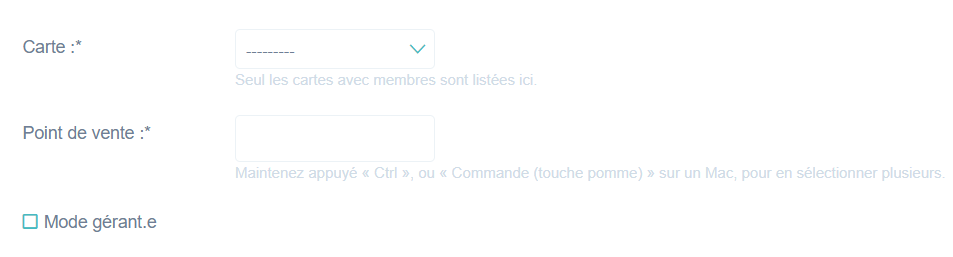
- Select the "printed number" of the card from the "Card" list.
- Designate the points of sale controlled or not by this card. If you don't have a point of sale yet, you can create one by following this guide: Create a Point of Sale.
- Determine the access level for your user here.
- Enable manager mode if desired.
- "Manager Mode" allows you to delete an order that has already been placed, even if it has been paid. It’s a superpower that comes with great responsibility.
- Save.
A member can have multiple primary cards.
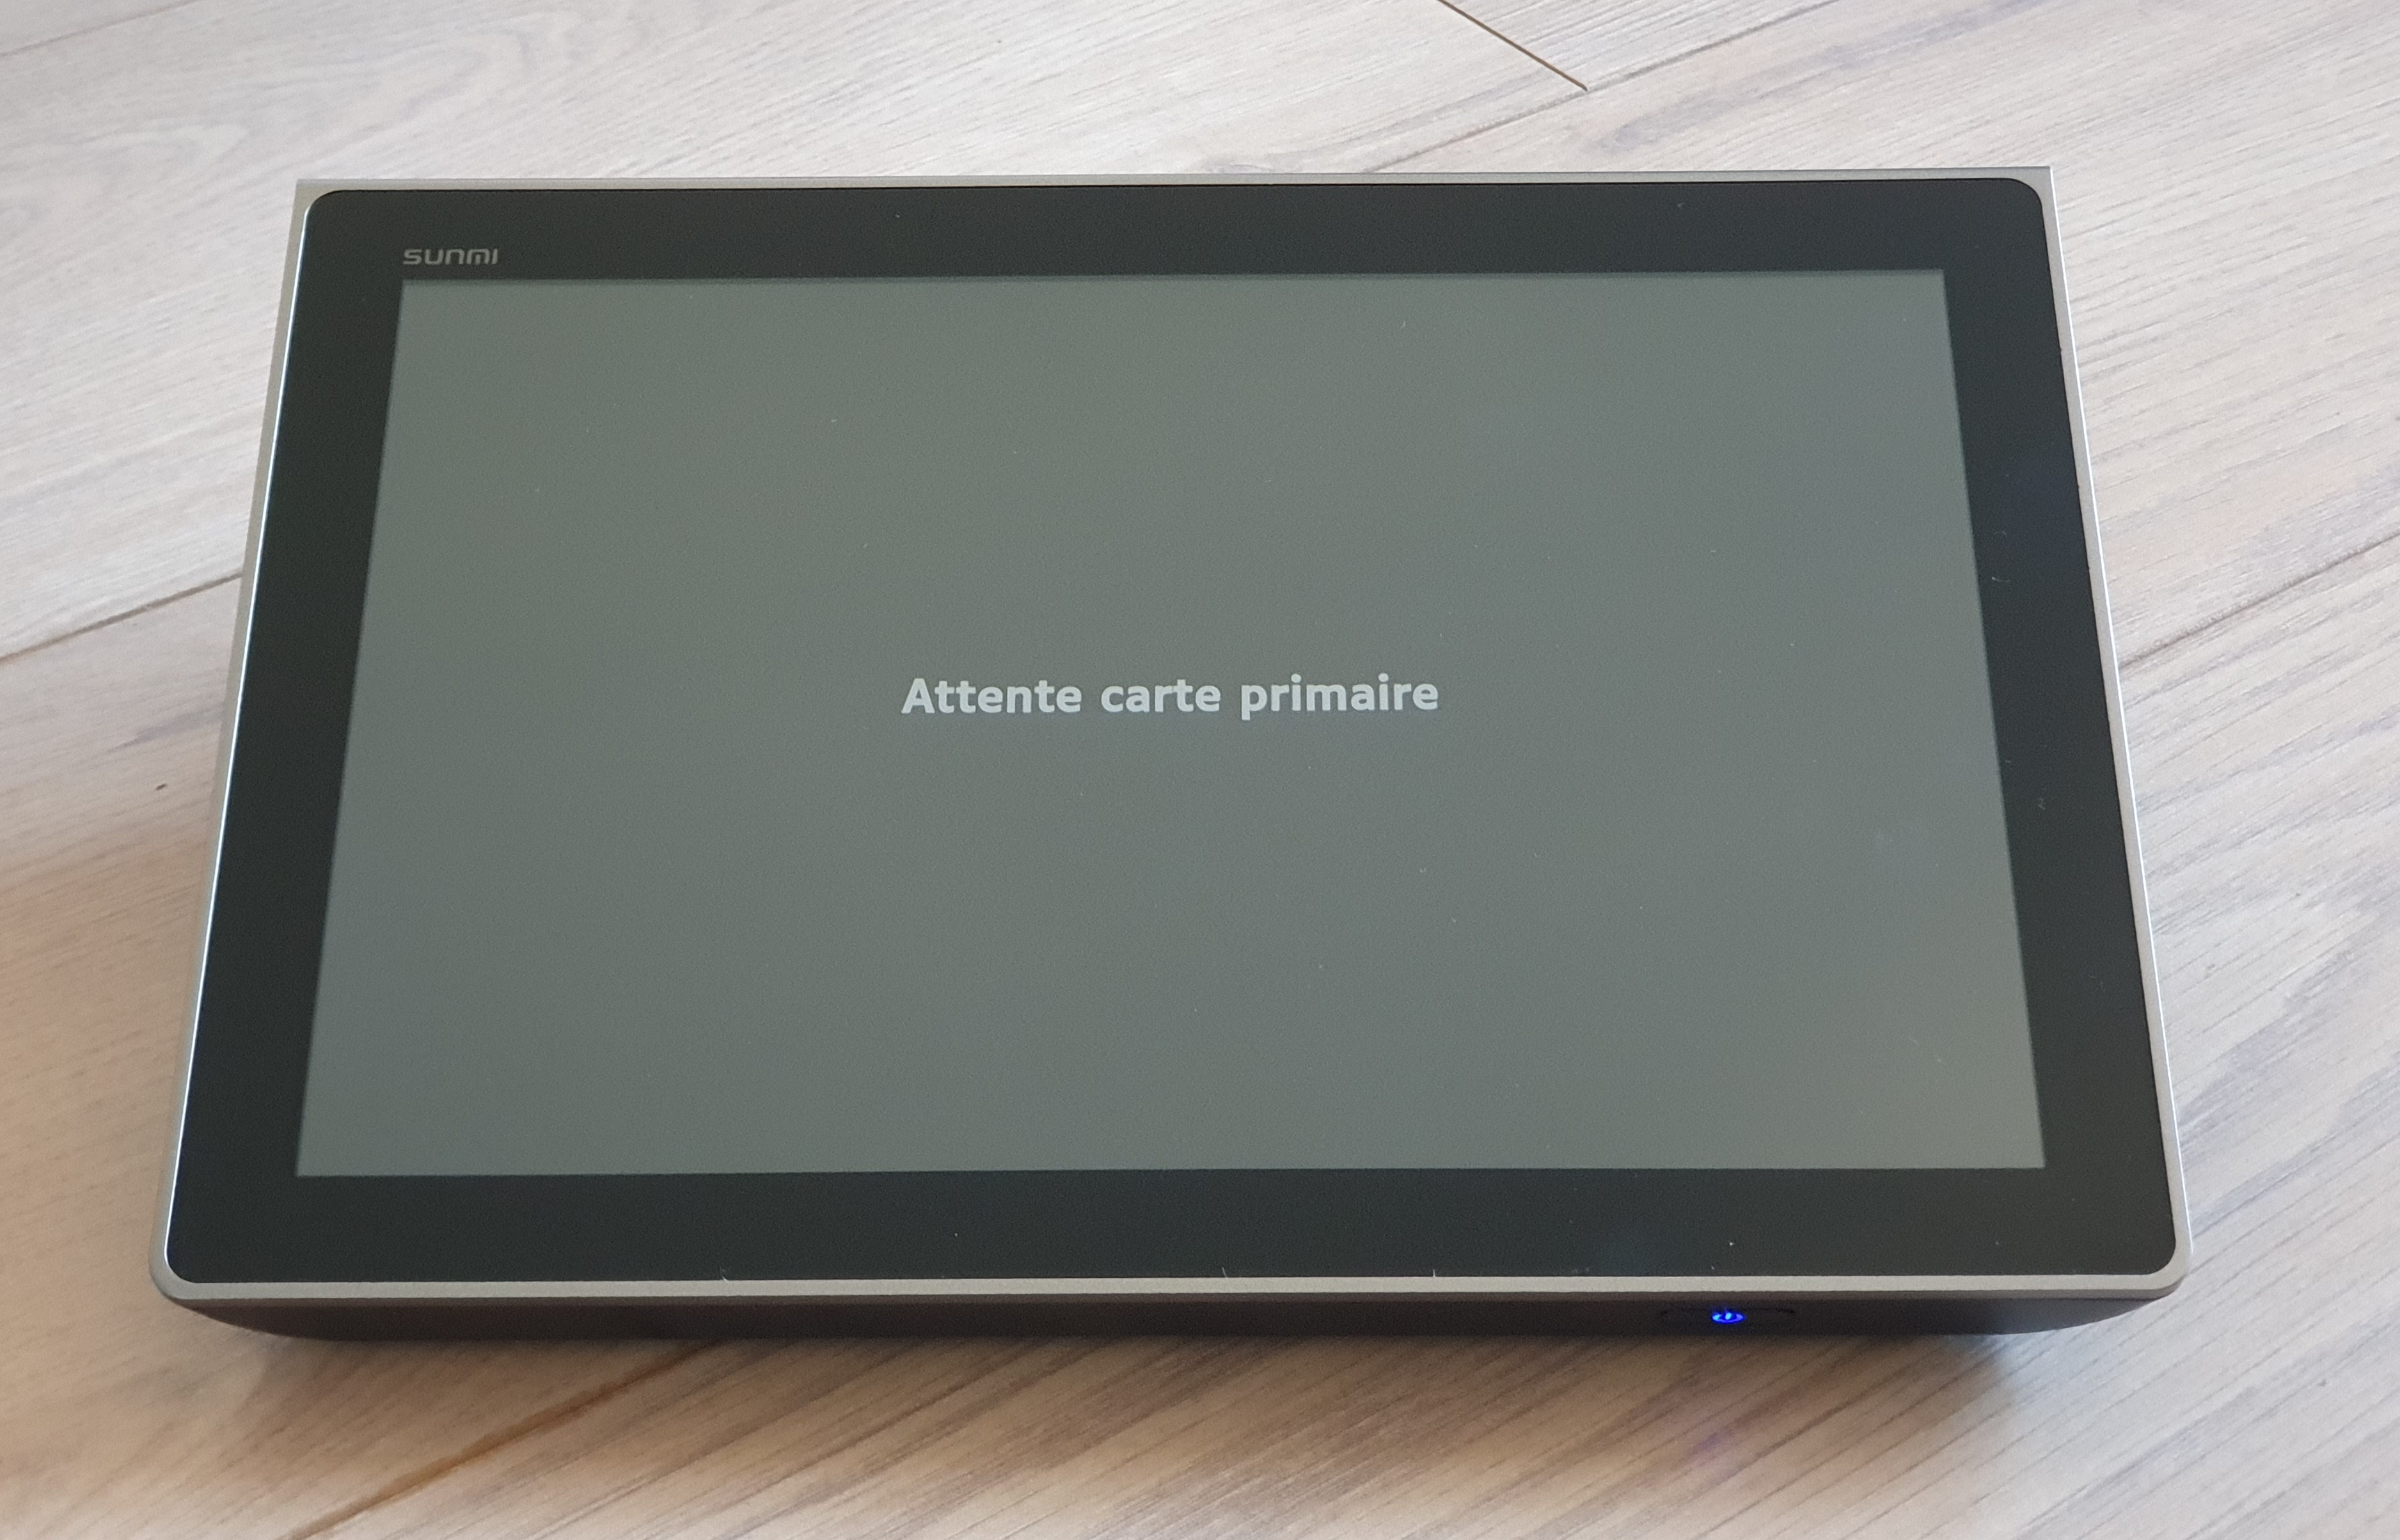
5- Test the card at a point of sale
- Launch the TiBillet application on a terminal or smartphone equipped with an NFC reader.
- Follow the [pairing procedure](cf. Android application) if you haven't already.
- Scan the card when prompted "Waiting for primary card ”, this will allow you to make the primary card visible on the admin.
- If you don't see your point of sale, check that the points of sale are associated with the card.
- You can now access your products.

On phone :
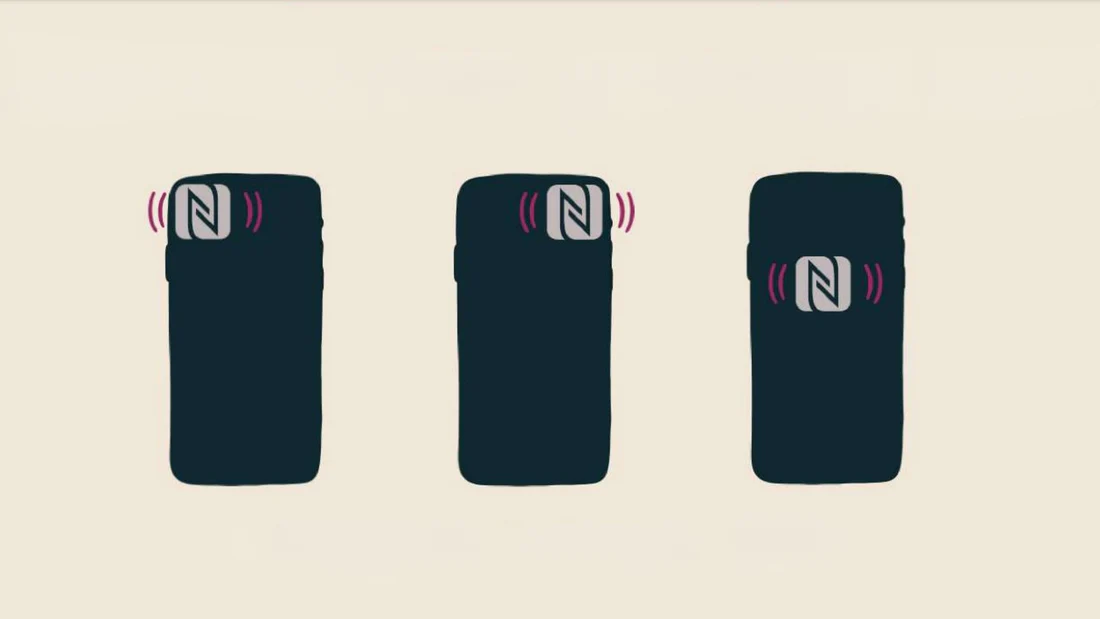
The NFC sensor on smartphones is generally located :
- On iPhones: top right or top left of the phone.
- On Android phones: often in the center, on the back of the device.
When using an NFC card, remember to position the card in the right place for optimum reading.