Preparations and impressions
To facilitate organization in the kitchen or at the bar, orders can be printed out directly on a dedicated printer. This enables preparation teams to receive instant details of orders to be processed, reducing errors and improving speed of service.
To ensure that orders are correctly sent to the kitchen or bar, it's essential to link each preparation location to a printer and the corresponding item categories.
Here's how to do it:
- Go to “Preparations and printouts” in the left-hand menu.
- Click on “Add preparation and printing”.
- Enter the name of the area concerned (e.g. Kitchen / Bar).
- Select the item categories to be sent to this location.
- Choose an icon to quickly identify the area (optional).
- Select the printer dedicated to printing orders (add printer and modify option).
- The ticket counter shows how many orders have been printed.
- Specify how many tickets should be printed for each order.
- Save
Add printer
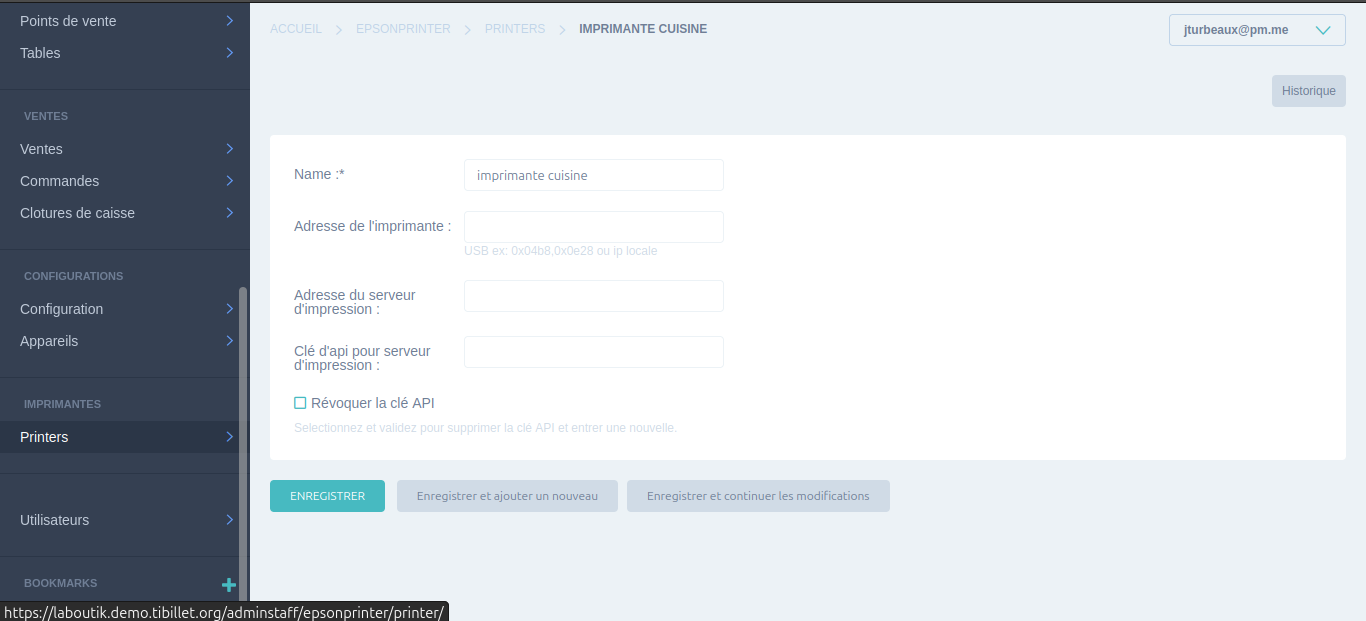
In addition to configuration via “Preparations and printing”, you can add a printer directly from the dedicated menu. This method allows you to integrate a printer even before associating it with a point-of-sale or preparation location.
- Go to “Printer” in the left-hand column.
- Click on “Add printer”.
- Fill in the following information:
- Printer name (e.g. Bar Printer, Kitchen Printer).
- Printer address (required for connection).
- Print server address (if a server is used).
- Print server API key (required for authentication).
- Revoke API key :
- Check the corresponding box if you wish to delete and generate a new API key.
- Save

Whether you choose the “Preparations and printing” or the “Printer” menu method, you can easily add a printer and associate it with your points of sale or preparation locations to efficiently manage order printing.